VMware: Reload the vmx from Service Console
Scrolling through the knowledgebase rss feed I found an interesting kb article 1002929. It describes how to change the snapshot location. But it also shows how to reload a vmx file without deleting it from inventory and register it again. From time to time you need to edit the vmx file. But it is very annoying when the vmx is edited, and you have to do all that work before you can see the changes that were made. Removing and re-adding the vmx will always have some drawbacks. So to overcome this we can use the vmish command to reload the vmx. Let’s check out the command line from the kb article vimsh -ne "vmsvc/reload <VmId>". To get this working we also need the VmId.
Here are the steps to do this:
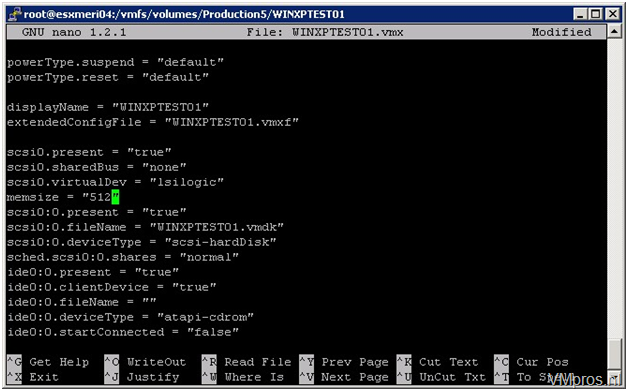
 1. Logon to the cos where the VM is registered. For this example I’ll edit the memsize from 368 to 512.
 2. Use nano or vi to make configuration changes. I changed the memsize from 368 to 512.
3. In the cos run the command vimsh -ne “vmsvc/getallvms”. This will show all VM’s running on that host. The first number on the left is the VmId. Instead of going throw the the list of vm’s you can use the following command vimsh -ne “vmsvc/getallvms” |grep <vmname>. In this example the command will look like vimsh -ne “vmsvc/getallvms” |grep WINXPTEST01 4. Now we know the VmID run the following command to reload vimsh -ne "vmsvc/reload 1360”
 5. After a few seconds the changes are seen in the VIC. As you can see from the screen shots the memsize has changed from 368 to 512.
The command also works on vms that are powered on but you have to shutdown the vm to see the changes.
To check out more vmish commands go to xtravirt’s vimsh documentation


1 thought on “VMware: Reload the vmx from Service Console”