Today I installed a new Dell PowerEdgde R620 host with vSphere 5.0 update 1. The Intel Ethernet I350 adapter was recognized and installed correct but the Broadcom 5720 wasn’t. I downloaded the latest Broadcom driver CD from VMware and uploaded the extracted content to my local datastore.
To install the drivers I used the following command:
esxcli software vib install -v /vmfs/volumes/pathtodatastore/NIC/net-tg3-3.120h.v50.2-1OEM.500.0.0.472560.x86_64.vib
^ full path to the file must be specified

After reboot the Broadcom adapter was installed successfully:

More information: VMware
Sander Daems is founder and author of this blog and working as a Lead (Sr.) Consultant by UNICA ICT Solutions. Sander has over 15 years experience in IT, primary focus: virtualization and modern worksplace.
More Posts - Website
Follow Me:


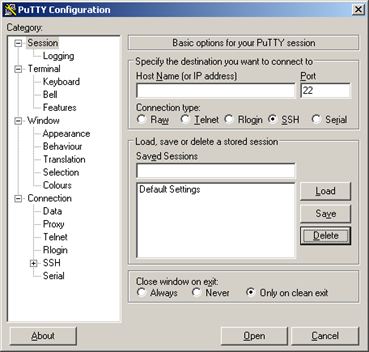
2011-07-12 PuTTY 0.61 is released:
PuTTY 0.61 is out, after over four years (sorry!), with new features, bug fixes, and compatibility updates for Windows 7 and various SSH server software.

Download: PuTTY
Sander Daems is founder and author of this blog and working as a Lead (Sr.) Consultant by UNICA ICT Solutions. Sander has over 15 years experience in IT, primary focus: virtualization and modern worksplace.
More Posts - Website
Follow Me:


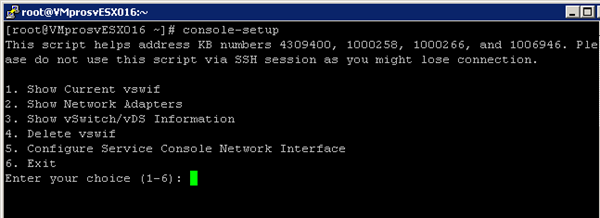
Oke.. I didn’t know this feature, last week a colleague consultant shows me a little menu to (re-)configure the ESX service console. With the command “console-setup” you can add or delete some vSwitches, create a new SC and view current configurations.
If you never worked with ESX CLI then will this a nice feature to setup/troubleshoot the SC.

The option “Console-setup” is available since ESX 4.0 update 2
Menu structure:
When you console-setup as root from the service console, you are presented with this menu:
1. Show Current Service Consoles
2. Show Network Adapters
3. Show vSwitch/vDS Information
4. Delete Service Console
4.1 Select the interface to delete, defaults to vswif0
5. Configure Service Console
5.1 vswif ID, default to vswif0
5.2 Name of service console port group: default to “Service Console”
5.3 vSwitch for service console, default to vSwitch0
5.4 IP Address:
5.5 Subnet mask:
5.6 Default gateway:
5.7 VLAN ID: default to 0
5.8 vmnic to use for the service console
5.9 Save Changes
5.10 Return to Menu
6. Exit
Use:
- Options 1,2 and 3 for display current information
- Option 4 to remove an existing service console interface (vswif). You may also do this, if you want to recreate it.
- Option 5 to change the configuration of an existing vswif interface, or for creating a new one.
More information: VMware
Sander Daems is founder and author of this blog and working as a Lead (Sr.) Consultant by UNICA ICT Solutions. Sander has over 15 years experience in IT, primary focus: virtualization and modern worksplace.
More Posts - Website
Follow Me:


You can monitor/check your ESX performance with esxtop, by generating a share to your vCenter Server and view the results with Perfmon you can follow this article.
Create Credentials:
1. I created a new share on my vCenter 2003 on E:\Logging\
2. I created a new user with username: Logging and password: Logging
3. On the new created folder I add the Logging account with full permissions to the security rights:

Read more…
Sander Daems is founder and author of this blog and working as a Lead (Sr.) Consultant by UNICA ICT Solutions. Sander has over 15 years experience in IT, primary focus: virtualization and modern worksplace.
More Posts - Website
Follow Me:


After upgrading from VMware ESX 3.x to ESX 4.0 you can cleanup the bootloader from the older ESX 3.5 installation. You can do this from the console of by connection the host with ssh, give the command “cleanup-esx3”
Little note: You can run the cleanup-esx command as long as everything works for you in 4. If you use the -f flag, the software prompts you to confirm that you want to disable the ability to roll back to the ESX 3.x.x.
Thanks xchello from Dutch VMug for the tip!
Sander Daems is founder and author of this blog and working as a Lead (Sr.) Consultant by UNICA ICT Solutions. Sander has over 15 years experience in IT, primary focus: virtualization and modern worksplace.
More Posts - Website
Follow Me:


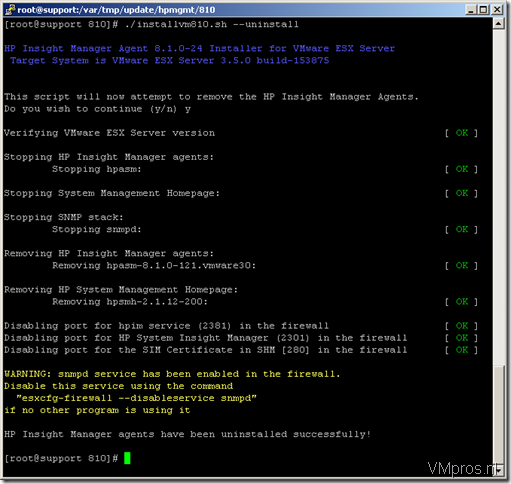
Het is daarstraks niet gelukt om te upgraden van HP Management Agent versie 8.1 naar versie 8.2, had voorheen ook mijn oude installatie bestanden verwijdert.
Om de HP Management Agents te deinstalleren opnieuw de oude “hpmgmt-8.1.0-vmware3x.tgz” gedownload en uitgepakt met tar -zxvf hpmgmt-8.2.0-vmware3x.tgz
Uit de map: /var/tmp/update/hpmgmt/810/ het volgende commando uitgevoerd:
./installvm810.sh –uninstall
De agents worden nu juist gedeinsatlleerd:

De nieuwe installatie kan worden uitgevoerd.
Sander Daems is founder and author of this blog and working as a Lead (Sr.) Consultant by UNICA ICT Solutions. Sander has over 15 years experience in IT, primary focus: virtualization and modern worksplace.
More Posts - Website
Follow Me:


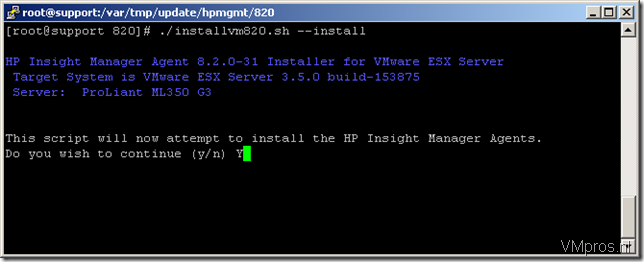
Download: hpmgmt-8.2.0-vmware3x.tgz
Download URL: http://h20000.www2.hp.com/bizsupport/TechSupport/SoftwareDescription.jsp?lang=en&cc=US&swItem=MTX-f7e5291b6fe84bdd95f996a7b1
Release notes:
Important:
- The HP Insight Manager Agents version 8.2.0 supports VMware ESX 3.0.2 and higher versions only.
- The upgrade of HP Insight Manager Agents is not supported. Please uninstall the older version before installing the HP Insight Manager Agents version 8.2.0.
- The Emulex and Qlogic libraries will need to be downloaded from Qlogic and Emulex websites directly. For detailed download and installation instructions for these libraries, please refer to the “README” file, which is included in the downloadable HP Insight Manager package.
Notes:
- For the HP Insight Manager Agents to function properly with ESX 3.x, the firewall ports for the ‘hpim’ service (2381) and the ‘snmpd’ service need to be enabled. Please see the README file for additional details regarding how to enable these firewall ports during the Insight Manager Agents installation.
- Configuring multiple trap destinations during silent installation of this package is currently not supported. If you want to configure multiple trap destinations, edit the “snmpd.conf” file to add the trap destinations and restart both the ‘snmpd’ and ‘hpasm’ services.
- If the internal health LED on a server is amber, the server might shutdown or reboot as soon as the HP Insight Manager Agents are installed. This feature is called Automatic Server Recovery, and is enabled to ensure that the server can be recovered even though there is a major hardware problem. Please get the hardware error fixed if the color of the internal health LED on your server is amber.
- The hp-OpenIPMI package is installed on ESX 3.0 and above. This package is for servers with iLO 2 and an IPMI Base Management Controller.
- During the installation and configuration of HP Insight Manager Agents, the install script may prompt whether to keep the existing snmpd.conf file. The default to this prompt is ‘n’, which will then continue to gather the required SNMP configurations. Answer ‘y’ to this question only if you have a snmpd.conf file already configured with read/write strings and dlmod support.
Supported Devices and Features:
Supported Operating Systems
VMware ESX Server 3.x

./installvm820.sh –silent –inputfile hpmgmt.conf


Sander Daems is founder and author of this blog and working as a Lead (Sr.) Consultant by UNICA ICT Solutions. Sander has over 15 years experience in IT, primary focus: virtualization and modern worksplace.
More Posts - Website
Follow Me:


Recent Comments